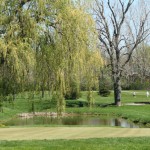
In the early 2000s, the golf landscape along Clarence Center Road in Akron underwent an abrupt change. The 18-hole, Bright Meadows course was reduced to nine holes, to make room for a new, 18-hole championship layout. The second nine holes, plus a new plot of land to the east, were turned over to the capable hands of Lockport-based architect Scott Witter. The resulting course brought strategic decisions to public-access golf in the eastern suburbs, along with a variety of options for approach and recovery shots. The putting surfaces are large, with variety in their undulation.
Holes 1-3
The first two holes at Arrowhead are among the most challenging of the entire course. The play on #1 is to resist the rightward bend of the hole and land toward the left side of the fairway. Attempting to carry the crossing creek is a fool’s errand and the view to the landing area and the green open up from the left portion of the fairway. The green is reachable in two, but water protects the entire, left-side run-up to the green, while two bunkers protect the putting surface. Once aboard, your first putt is makeable, as the green is one of the smallest on the course. Number two is a dogleg-left, par four from a rise into a dell. The most natural green site on the course is not easy to find, however. The tee ball must negotiate an undulating fairway guarded laterally by bunkers. The approach to the green drops a good ten feet from the fairway landing area and the glade is shielded on three sides by trees, making wind judgement tricky. The large green is not easy to one- or two-putt, so don’t think that your work is done once you reach the putting surface. Hole number three offers the third consecutive, challenging drive. Played uphill then down, to a blind landing area, there is room on either side for a miss, but the shot from the middle has the easiest chance to offer an opportunity to attack the hole location. An enormous thumbprint creates a lower, front-left tier that serves to absorb weak approaches. Any attempt to reach a rear hole location requires you to flirt with protective sand and collars of rough.
Holes 4-6
The fourth hole is the most memorable par three on the course, with complete respect for the other, one-shot holes at Arrowhead. Playing across a pond shared with holes one and three, the mid- or short-iron demanded off the tee must cross a stone bulkhead that shores up the front of the green. A native area guards the rear of the green, so a precise calculation is required or all is lost. The fifth hole is the first of three consecutive, short par four holes. Playing parallel to the third hole, number five features one of the few, front-to-rear sloped greens on the course. A nest of bunkers protects the right side of the fairway, but don’t be tempted to carry them. The play is up the left side, from where the green surface may be viewed in its entirety. Water awaits beyond the putting surface, so play in with one less club, to be safe. Hole number six reverses direction, heading westward around a right-side pond. Less than driver off the tee is the proper play, again up the left side. Once the fairway is found, the hole may be sighted and attacked with abandon, as little trouble impedes an aggressive approach shot.
Holes 7-9
The final three holes on the outward nine bring excitement and hope for birdie to the table. The seventh is the first of two, driveable par four holes on the course. Measuring 330 from the tips, most golfers will be licking their chops on the tee. Be warned: it’s really tough to hit this green with your drive! Balls that pass over the fairway cross bunker will bound toward the green, but will then be deflected toward the front-left bunker. Since the green runs from front to back and is quite tiny, any approach shot must be well-gauged to have any hope of snuggling up to the flagstick. The 8th hole is an apparently-daunting par three with a very puttable green. The key here is to ignore the trouble short, left and right and get the ball on the green. While the putting surface has breaks to it (as well as upper-rear and lower-front tiers), if you find the proper tier, your run at birdie will be manageable. The ninth hole is a healthy par five, running parallel for a time to the first hole. It also doglegs right, yet presents much less trouble than does the opener. Two sets of fairway bunkers, one in the drive zone and another in the lay-up area, must be met with character and courage if the green is to be attacked on the third shot. A large and round affair, the ninth-hole putting surface offers a healthy challenge to the flat stick as the front side concludes.
Front Nine Gallery
Holes 10-12
Arrowhead’s second nine gets off to an exciting start. A reachable par five hole, with two daunting crossings, livens things up. Most will have no trouble carrying the creek that waits off the tee; it’s the wetlands that front the narrow green that get the pulse pounding. Eagles are not a rare bird on this hole, which is the way golf should be. The second hole on the back is a strong par four that doglegs right around the 16th green. The fairway leans left, so balls played up that side of the short grass will find the longer variety. The approach comes in to a green with a bit of a false front to it. Take enough club to ensure that you reach the putting surface. The 12th is a par three of medium length. It has a bit of a kick slope on the higher, right side, that helps to feed balls around the front-left bunker toward rear-left hole locations. Although it appears innocent, putts of any distance will feature notable break and vertical change that conspire to invoke a three-putt.
Holes 13-15
The thirteenth is the stoutest par four on the course. It goes well over 400 yards from most tees and typically plays into a proud wind. If you view it as a half-par hole, where 4s and 5s walk hand in hand, you’ll head to the 14th tee in the proper frame of mind. The key is to avoid the fairway bunkers and place a second shot fairway center, just shy of the green. The putting surface is enormous, with multiple quadrants. Three whacks are common. Hole fourteen is the second, driveable par four on the course. Unlike the 7th, this green can be reached with the tee club; you just have to avoid the pond up the right, the bunkers in front and the oob up the left side. If you’re brave of heart, take a swipe at it. The green is receptive to all approach shots, though, so unless you have a skin on the line, any second-shot will leave a manageable birdie putt. The fifteenth hole is the final par five hole. Drivers should be more concerned with the bunker trio up the left side than the pond on the right. Perhaps the widest fairway on the course, number fifteen offers the opportunity to slam one out there and crush a second up the heart of the trail, on or near the green. A pair of bunkers guard the lay-up area, some sixty yards short of the putting surface. Another enormous putting surface fortunately boasts fewer, subtle undulations than might be expected.
Holes 16-18
Hole sixteen is the final, one-shot hole on the course. It plays uphill, typically into the wind or into a crosswind. The native area fronting the tee decks is eye candy; if you can’t carry it, you need a lesson. The green site is the most attractive on the course, nestled up into an elevated dell (if such a thing can exist), evoking the essence of Irish golf. The green is two- or three-tiered, depending on your point of view, and is marked with an enormous sand bunker on the front right, and a smaller, almost-pot bunker in the back. The seventeenth offers the last, realistic shot at birdie, unless you’re Lonnie Nielsen. A dogleg right around a bunker and a field of thick fescue, 17 is also guarded fairway center by a coven of sands of despair. You can’t go wrong anywhere, but you can be more correct if you know the hole and your own strengths. The putting surface is interesting, yet not unconquerable. Two bunkers hug the green, but you should be zeroed in on that flagstick! The closing hole is one of the most picturesque in western New York. It’s that money shot, that elegant trace that all architects hope they can build at least once in their lives. The hole rises, then falls to the fairway landing zone. Sand left pushes you down to the right, toward a complete carry over the pond that fronts and sides the green. No matter where your drive abates, you’ll need an areal approach to find the putting surface. Take a deep breath, exhale and let it all ride. Oh, when you get to the green, you’ll still have work to do, but that’s the fun part.
Back Nine Gallery


