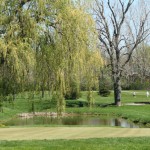
As the sun tucked in for the evening on Sunday, a few early arrivals refined their swings and honed their putting routines on the River Oaks practice facilities. On Monday morning, most of the field will be on the course for a practice round. Some will participate in the Ham-Am, but all will take notes on the nuances of the 7000-plus yard, Desmond Muirhead golf course. With that in mind, and for fans of junior golf as well, it’s time for a front-nine preview of River Oaks.
Hole #1: Known by amateurs as a gentle handshake and by competitive golfers as a birdie opportunity, there is a chance that the green on this par four might be driven by longer hitters in the field. The opener at River Oaks plays downhill from tee to a swale that fronts the slightly-elevated green. Although there are no fairway bunkers on the hole, a pushed drive might find the ones that adjoin on the parallel ninth hole. The green is protected on the left back and front, and the right front, by three bunkers. The putting surface is enormous, with multiple hole locations. Other than the back terrace, where the sucker pins lurk, every other placement is a “go” position.
Hole #2: Depending on the location of the tees, the second hole could play as one of the two toughest holes on the course. Although only 420 yards, trees and sand conspire to offer a very narrow tee shot where right-to-left is not an option. At its most narrow, the landing area is a scant 15 yards across. For you US Open fans, that’s slimmer than any fairway at Pinehurst. Competitors will be forced to lay up inside the three bunkers that lie some 270 yards from the tips. If the tees are up, golfers will be able to launch past the sand and take advantage of the downward pitch of the fairway. At that point, number two becomes a birdie hole. Although the green is guarded front and back right, and front left, by sand, the ample putting surface will accept approach shots of all distances. Other than short-siding yourself, recoveries from around the green are manageable.
Hole #3: The second birdie hole in the first three, the third hole might actually be more of an eagle hole. Golfers who catch the speed slot on the left will see their tee balls bound forward toward the green. They might find themselves inside 200 yards. A solitary, drive-zone, fairway bunker sits benched in the hillside on the right, about 280 yards from the green. Approaching the putting surface, two more fairway bunkers guard the left side of the hole, some 70 and 40 yards shy of the green. Four bunkers ring the green, which is large but deceptively fast from back to front. In fact, a front hole location might cause more harm than good!
Hole #4: A tough, two-hole stretch begins with number four. The longest par four at the course typically plays into a southern wind, adding 15 to 20 yards to each shot. The fairway is wide, wide, wide, so long drivers, take note. One fairway bunker guards the left side. A trio of bunkers circles the green, one of the largest on the course. A huge ridge bisects the middle of the green. Find yourself on the wrong side and a three-putt enters the picture.
Hole #5: The first par three on the course plays to the widest green at River Oaks, across the most yawning bunker Muirhead may have ever built. Shots to the left side of the green have a chance to run up, but anything played center or right must carry the enormous sand cavern. Although the putting surface is flatter than the previous one, anything over thirty feet offers as much challenge as needed by the flat stick.
Hole #6: The sixth hole bears one of the most undulating fairways on the course. It heaves and pitches like the ocean, eventually emptying out like a river into its estuary, the putting green. Like number 3, the tee ball is blind and a sight line must be selected in advance. Sand swallows wayward shots to the right and a line of trees left blocks approaches into the green. Another enormous putting surface, protected by three bunkers, offers multiple hole locations and tremendous challenge.
Hole #7: The second par five on the southern loop is a thinking golfer’s hole. The tee ball fits between two fairway bunkers, then a decision is made. A run at the putting surface brings left-side trees and right-side sand into play. The conservative approach proposes a lay-up to 14o yards, then a short iron into yet another, enormous green. Three treacherous bunkers obstruct views of the middle and rear portions of the putting surface.
Hole #8: Muirhead’s second par three appears to be an all-or-nothing play over a stand of water on the left. A closer look reveals a kick-plate on the fairway fronting the right portion of the green. The plate propels balls that land fifteen yards short forward and onto the green. There is no real need to fly the ball all the way to any pin position, as the front-to-back sloped green compels all approach shots toward the rear.
Hole #9: The front side’s home hole is as wide as the come. The right bunkers in the fairway direct your attention toward the lower, left portion of the short grass. The better angle of approach is from the left. After playing somewhat down to the fairway, the approach runs directly uphill to a skyline green. Three bunkers again guard a Surprise! enormous putting surface. After nine holes, your putter may be worn out from lengthy approach strikes.


